Understanding your space will help you fully maximize the potential that exists for your project.
There are three mistakes you want to avoid when planning for any landscape project.
-
Missing out on opportunities (FORM)
-
Poorly locating your project (FLOW)
-
Building something the wrong size (FUNCTION)
The best way to avoid these mistakes is through planning. Even if you hire a designer and a contractor, you should be involved in the vision process that will ultimately drive the design.
By using these 3 Must Know Landscape Design Tools you will have a very positive experience and outcome for your project.
-
FORM - doing a full intake of existing space helps drive the form that a project will take
When you pay attention to form you will be able to take advantage of all present opportunities!
If you refer back to the last post about creating your landscape vision by creating a story board, you will remember we were speaking creatively about inspiration and ideas. Now that we are working on planning, we need to be a bit more concrete about the space.
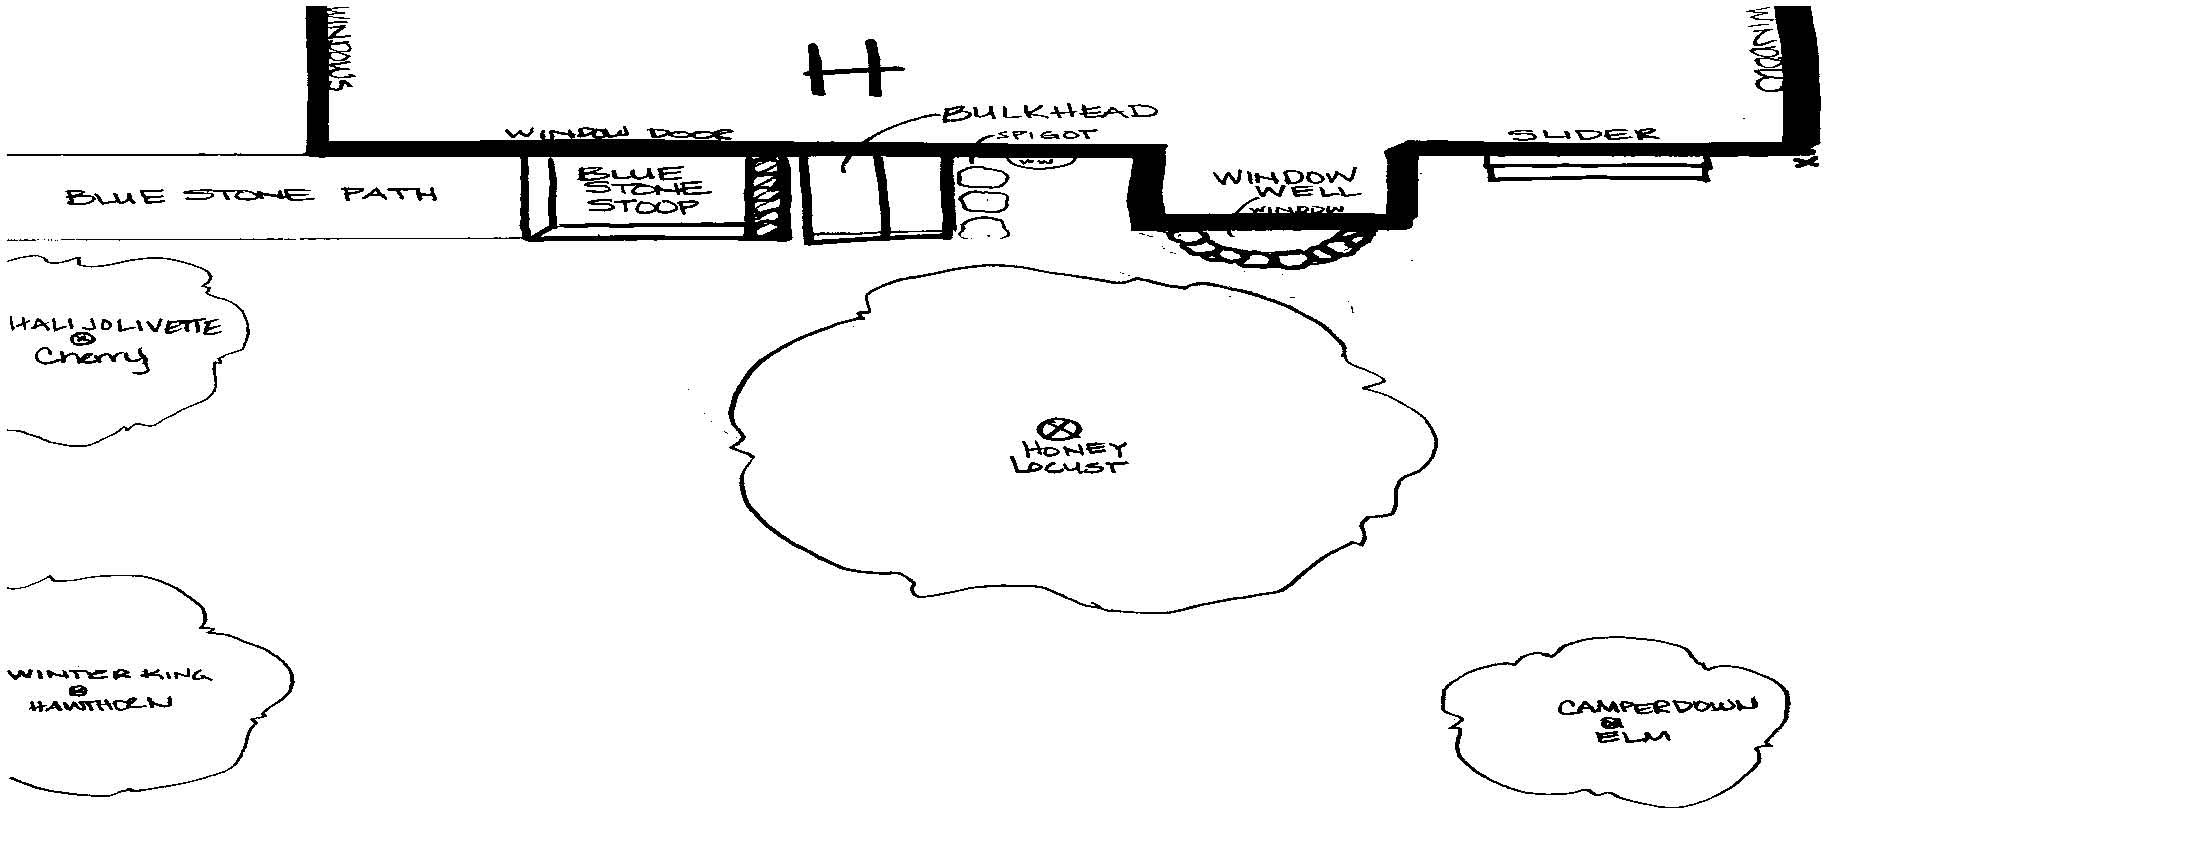
To do this you will want to go out to the landscape area and sketch what is there. You don't have to be an artist or have skills in mechanical drawing. Use graph paper and your eye...there is plenty of time yet to measure and plot. First you need to understand what is there. Hand drawing forces that to happen because it takes time to complete.
Don't merely go out and take pictures and then use those to plan.
WHY?
Because when you are photographing you are not truly seeing all the detail. Scan the site slowly with your eyes in order to SEE everything: the spigot, the electrical outlet, the chipmunk hole, the root popping out of the ground, the piece of ledge outcrop...all of it. Then sketch it out as above.
-
FLOW - understanding the movement and circulation will drive how you locate each function

When you pay attention to flow you remove the risk of placing your project in the wrong place!
Once you have your diagram created, make a few copies of it to work from. Never use your original. Trust me it stinks when your original is ruined by erasure marks!
Now go back out and walk around - not in circles aimlessly - walk with purpose: to the shed, to the play set, to the garage. Hold your head up and walk in the way it makes sense to get to where you want to go.
Now draw arrows to represent the circulation or flow of your movement. This will start to frame the space for you so that you can understand how you travel through it.
-
FUNCTION - preparing a concise list of activities and uses for the project space will drive the size requirement
When you pay attention to function you remove the danger of building your project at the wrong size and scale in relation to use!
In the last post we spoke about the NEEDS, WANTS and WISHES that were driving your project. This is the fun part where you begin to revisit this list. Given the space you have - FORM - and the circulation you have - FLOW - how are your going to program the use and FUNCTION for this project?

For my patio project I need to figure out where the actual "patio room" goes. Where are we going to sit, cook, and gather?
In looking at my patio layout diagram you can see that I used circles to mark out the areas where gathering could take place. As I was doing this, I actually identified two possible spaces. They don't both have to be patios. One could be for a patio, and the other for a small deck, or even a small lawn section.
Next, I overlaid and modified the flow patterns to work with the two programmed spaces, so that when I am thinking about the design I am saying to myself, "I will enter here and exit there." for example.
Additionally, you will see that a portion of the circles have been shaded with a diagonal hatching. These are the designated "Quiet Areas". By that I mean the spaces that traffic flow will not interrupt.
Now, with this complete I have a functional analysis of my site that overlays movement as well as use. This is the ground work for any landscape design project.
The snow is fast melting here in Massachusetts, so there is no excuse not to get out there and start to diagram your patio, deck, lawn area, pond garden, or any other landscape project you can think of.
I invite you to go and try it out and then post a comment below to let me know how you are doing. What is tripping you up? What are you noticing that is a surprise? I am sure your experience could inform other readers as well as me!
Create It As You Go!


Leave a comment