If you’re a gardener or a homeowner with foundation beds, perennial beds or mixed planting borders, chances are you’re already familiar to some degree with the task of edging – the creation of a defining line between one landscape feature and another, such as a lawn and a garden. There is nothing quite like a beautifully cut edge that adds clear boundaries, definition, and neatness to a landscaped area.
However, edging isn’t simply a rote task – it’s a journey. Just like a great travel adventure, edging isn’t only about the destination – the outcome – it’s about the trip. And that requires planning. Like life, creating and maintaining good edges is a journey as well that has the best outcome when the destination is clear and the travel plans are well laid. This means you need to map out your beginning and your end and the route in between. Then, as you’re making your way from point A to point B, you need to check periodically – look up – to see where you’ve been, where you’re going, and what the route looks like. Are you sticking to the lines on the “road” and traveling in the right direction?
If you’re making plans for your next edging “trip”, these six things may offer some guidance for a great trip:
- Long hoses
- Spray paint
- Spray can holder
- A buddy
- An edging tool
- Patience
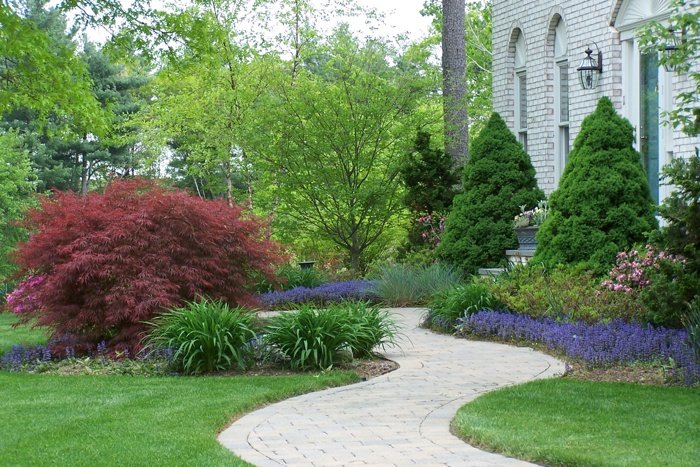
The idea that edging is a journey with a well-planned route is not as silly as it might sound. If you look at a bed line maintained by a landscape professional you’ll notice it has a smooth flow and form to it, while many homeowners’ beds sport uneven lines, poor definition and a choppy or wobbly look to them. The results are radically different and painfully obvious. You’ll see immediately the importance of mapping out your edging before you start.
Industry pros take great pride in a “nice” bed line. One that is smooth and flows naturally. If you are doing a curvilinear design – creating a wavy look – the convex and concave arcs need to make sense and not just wiggle randomly. You’ll want to work in long sweeps as much as possible. That might mean following some naturally occurring contours in the land or accommodating a focal tree or a perennial bed to create a sense of harmony.
When attempting to create a simple straight-line edge from point A to point B the best practice is to set a string line between your point A and B marks. Mark that line with spray paint so that when you edge you don’t veer off course, creating an uneven edge that wanders.
If you want a curve that follows that straight line, you’ll want to set your tangent point (HA…who said geometry wouldn’t be useful in REAL live?). This line is your tangent – the straight line that touches the height of your curve. Using a warm malleable hose (you get one of those by leaving yours in the sun for a bit before working with it) set your hose out in an arch off the line. One step at a time you will create a “stencil” of your ultimate bed line by dotting sprays of paint along the hose. Stand back…take a look…does it flow? If the flow is there, pull away the hose, fill in your line with the paint and you’re good to start cutting your new edge.
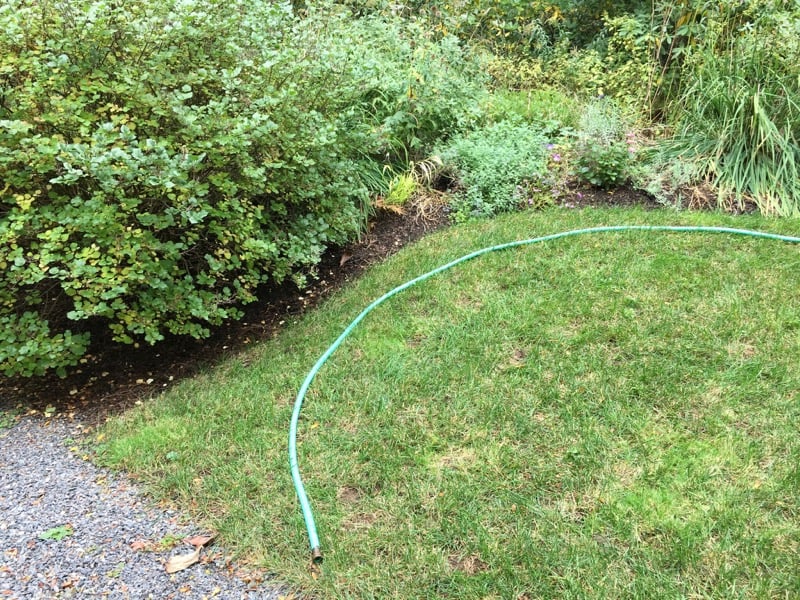 A soft warm hose to helps you to see the curve of a new bed line before you cut.
When working on long lines and curved beds, work with a buddy to help you place and shape that hose to define the curves between the straight line. This also gives you a broad view of the final look, so you can adjust the shape before you cut. In time, this will be come easier and you will be able to train your eye to naturally see “flow”. You’d probably get a chuckle at how attached many landscape pros are to the flow and beauty of their bed lines (yours truly included).
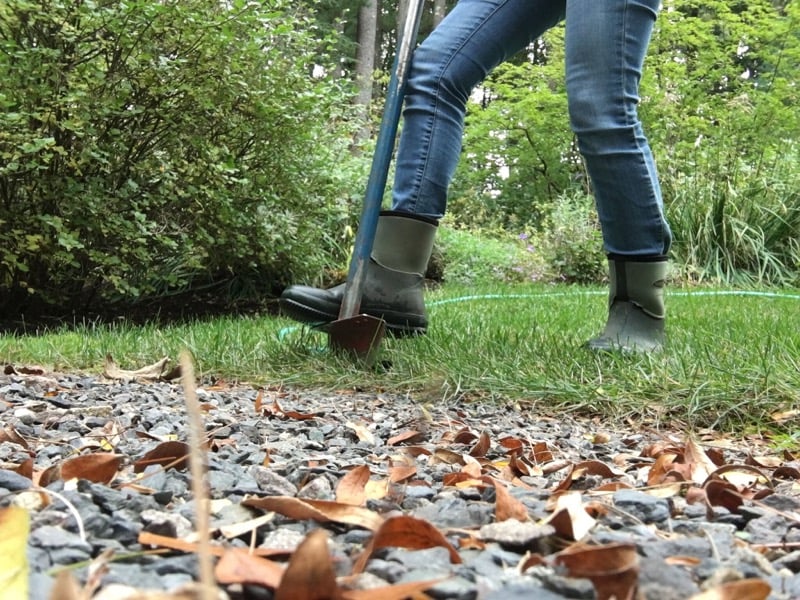
Garden edges can be cut at a 90-degree (to the ground plane) or 45-degree angle, depending on your preference. There is an ongoing debate about the “right” way, but the truth is either does the job. We do try not to make the edges “ankle breakers” – meaning too deep or harsh, Your building a mote or gully!
The practice of edging is really meant to keep turf grass in check. There are essentially three grass growth types – and I am simplifying here. Bunch growing (like ryegrass and fescues) which are clump forming bunches of grass. Stoloniferous types (like bent grass and St Augustine grass) that spread with “runners” that spread over the top of the soil and then root down and shoot up. And, Rhizomatous types (like Kentucky Blue Grass and Bahia grass) which spread with underground runners sending roots down and shoots up.
When you edge, you’re essentially interrupting the “running” of the stolon, or rhizomes, to keep them from invading the beds. You can also keep the clump forming grasses from moving into beds by keeping the clumps trimmed down.
So the purpose of edging is to create a sharp, definitive cut that not only defines the boundary between two areas, but also prevents lawn from spreading to where it shouldn’t be. Additionally, if you have aggressive groundcovers like Pachysandra, Vinca or even Ajuga for example, a consistent practice of edging keeps those plants well behaved and IN the beds.
Finally, use the right tool for the job – it’ll go a lot easier and the end results will look a lot better. While a standard straight edge spade will work, a much better option is a long-handled, manual edging tool with a sharp, rounded edge and a lip at the top of the blade to help you keep a consistent depth to your cuts. There are also a number of more expensive edging machines if you have the budget and inclination to use one. Personally, I am old fashioned and like the edge created with a simple manual edging tool.
Edging – it’s a deceptively simple way to add clarity and beauty to your landscaping. I like to think of the practice of “landscaping” as a “defining” practice – we DEFINE SPACES and to do so, we need clear boundaries and edges to help us see where those spaces start and end and how we flow in between them. We even purposefully blur them at times for effect – this is only possible when juxtaposed to well-defined space. So when edging, if you think of it as a journey that requires a little planning and the right gear to travel safely and effectively, you’ll have a successful “trip” and a more attractive landscape.
Need to see the lawn edging process? Watch the video: How to Edge Your Lawn

TWEETABLE TIP
Edging – it’s a deceptively simple way to add clarity and beauty to your landscaping.
VIA @GardenContinuum


Leave a comment